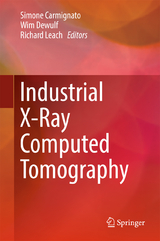
Industrial X-Ray Computed Tomography (eBook)
VII, 369 Seiten
Springer International Publishing (Verlag)
978-3-319-59573-3 (ISBN)
This book acts as a one-stop-shop resource for students and users of X-ray computed tomography in both academia and industry. It presents the fundamental principles of the technique, detailed descriptions of the various components (hardware and software), current developments in calibration and performance verification and a wealth of example applications. The book also highlights where there is still work to do, in the perspective that X-ray computed tomography will be an essential part of Industry 4.0.
Simone Carmignato is Professor of Manufacturing Engineering and Manufacturing Metrology at the University of Padua, Italy. His research activities are in the area of precision engineering and dimensional metrology, with focus on industrial computed tomography and advanced coordinate metrology. In 2012, he was awarded the F. W. Taylor Medal from CIRP, the International Academy for Production Engineering.
Wim Dewulf holds a Professorship in the Department of Mechanical Engineering at KU Leuven, Belgium, where he is leading research groups on Sustainable Engineering and on Dimensional Metrology. In the latter field, his major research themes include X-ray computed tomography, multi-sensor metrology, and automated inspection planning. He was, amongst others, coordinating the highly successful INTERAQCT project, which provided an extensive industrial-academic training environment for young researchers in the field of X-ray CT metrology.Richard Leach is Chair in Metrology at The University of Nottingham, UK, and heads up the Manufacturing Metrology Team. Richard's current interests are the dimensional measurement of precision and additive manufactured structures. His research themes include the measurement of surface topography, development of methods for measuring 3D structures, development of methods for controlling large surfaces to high resolution in industrial applications and x-ray computed tomography.
Simone Carmignato is Professor of Manufacturing Engineering and Manufacturing Metrology at the University of Padua, Italy. His research activities are in the area of precision engineering and dimensional metrology, with focus on industrial computed tomography and advanced coordinate metrology. In 2012, he was awarded the F. W. Taylor Medal from CIRP, the International Academy for Production Engineering.Wim Dewulf holds a Professorship in the Department of Mechanical Engineering at KU Leuven, Belgium, where he is leading research groups on Sustainable Engineering and on Dimensional Metrology. In the latter field, his major research themes include X-ray computed tomography, multi-sensor metrology, and automated inspection planning. He was, amongst others, coordinating the highly successful INTERAQCT project, which provided an extensive industrial-academic training environment for young researchers in the field of X-ray CT metrology. Richard Leach is Chair in Metrology at The University of Nottingham, UK, and heads up the Manufacturing Metrology Team. Richard’s current interests are the dimensional measurement of precision and additive manufactured structures. His research themes include the measurement of surface topography, development of methods for measuring 3D structures, development of methods for controlling large surfaces to high resolution in industrial applications and x-ray computed tomography.
Acknowledgements 5
Contents 6
1 Introduction to Industrial X-ray Computed Tomography 7
Abstract 7
1.1 History of X-ray Computed Tomography 8
1.1.1 X-ray Tomography 8
1.1.2 X-ray Computed Tomography 12
1.2 Evolution of CT Scanners 17
1.2.1 Clinical CT Scanners 17
1.2.1.1 First and Second Generation Clinical CT Scanners 17
1.2.1.2 Third Generation Clinical CT Scanners 19
1.2.1.3 Fourth Generation Clinical CT Scanners 20
1.2.1.4 Fifth Generation Clinical CT Scanners 21
1.2.2 Industrial CT Scanners 22
1.2.2.1 Industrial Fan Beam CT Scanners 23
1.2.2.2 Industrial Cone Beam CT Scanners 24
1.2.2.3 Other Advanced CT Setups 25
1.3 Industrial Requirements 26
References 27
2 Principles of X-ray Computed Tomography 30
Abstract 30
2.1 Fundamentals of X-ray Physics 31
2.1.1 X-ray Generation 31
2.1.2 X-ray Radiation Spectra and Focus 36
2.1.3 Interaction with the Object 39
2.2 Signal Detection and Processing 46
2.2.1 X-ray Detectors 46
2.2.2 Image Processing in CT 52
2.3 Reconstruction 59
2.3.1 Concept of Reconstruction 60
2.3.2 Fourier Slice Theorem 62
2.3.3 Filtered Backprojection 63
2.3.4 Sufficiency Conditions 68
2.3.5 Algebraic and Statistical Reconstruction Techniques 69
References 70
3 X-ray Computed Tomography Devices and Their Components 73
Abstract 73
3.1 Basic Configuration of Industrial Cone-Beam X-ray Computed Tomography Systems 73
3.2 Source 75
3.2.1 Filament 75
3.2.2 Electron Optics 76
3.2.3 Target 78
3.3 Detectors 84
3.3.1 Flat Panel Detectors Versus Linear Diode Array Detectors 84
3.3.2 Energy Integrating Detectors Versus Photon Counting Detectors 85
3.4 Frame, Kinematic System and Cabinet 86
3.4.1 Drive Systems 88
3.4.2 Bearing Systems 89
3.4.3 Displacement Transducers 90
3.5 Integrated and Special Purpose CT Systems 91
3.5.1 Multi-sensor Systems 91
3.5.2 Four-Dimensional X-ray CT Systems 91
3.5.3 Dual Energy CT Systems 92
3.5.4 At-Line and In-Line CT Systems 92
3.5.5 SEM CT for Small Samples 93
3.5.6 X-ray CT of Large and Highly Attenuating Objects 96
3.5.7 Synchrotron Industrial Tomography 98
3.5.8 Laminography for Flat Parts 99
3.6 Safety Aspects of X-ray CT Systems 100
References 101
4 Processing, Analysis and Visualization of CT Data 103
Abstract 103
4.1 Generalized Data Analysis Pipeline 103
4.2 Preprocessing and Data Enhancement 104
4.2.1 Smoothing 104
4.2.1.1 Global Smoothing 104
4.2.1.2 Local Smoothing 106
4.3 Segmentation, Feature Extraction and Quantification 108
4.3.1 Segmentation 108
4.3.1.1 Threshold-Based Techniques 109
4.3.1.2 Boundary-Based Methods 109
4.3.1.3 Region-Growing 110
4.3.2 Feature Extraction 111
4.3.2.1 Connected Component Analysis 111
4.3.2.2 Principal Component Analysis 112
4.3.2.3 Hessian Analysis 113
4.3.2.4 Template Matching 114
4.3.2.5 Clustering 115
4.3.2.6 Feature and Cluster Quantification 115
4.3.3 Surface Determination 116
4.3.3.1 Surface Extraction 116
4.3.3.2 Subpixel Approaches to Edge Detection 117
4.4 Visual Analysis 118
4.4.1 Common Concepts 118
4.4.1.1 Colours and Colour Maps 119
4.4.1.2 Juxtaposition 120
4.4.1.3 Superposition 120
4.4.1.4 Ben Shneiderman’s Visual Information-Seeking Mantra 121
4.4.2 Visual Metaphors 121
4.4.2.1 Volume Rendering 122
4.4.2.2 Slicing 122
4.4.2.3 Heat Maps 123
4.4.2.4 Scatter Plots and Scatter Plot Matrices 124
4.4.2.5 Graphs 125
4.4.2.6 Parallel Coordinates 125
4.4.2.7 Glyphs 126
4.4.3 Comparative Visualization 127
4.4.4 Uncertainty Visualization Concepts 127
4.5 Processing, Analysis and Visualization for Metrology 128
4.5.1 Data Fusion of CT Data for Metrology 130
4.5.2 Visual Analysis of Dimensional Measurement Features 132
4.6 Processing, Analysis and Visualization for Non-destructive Testing 134
4.6.1 Visual Analysis of Voids 136
4.6.2 Visual Analysis of Fibres 136
4.6.3 Visual Analysis of Fibre Bundles 137
4.6.4 Visual Analysis of Dynamic Processes 138
4.7 Specialized Analyses 140
4.7.1 InSpectr 140
4.7.2 GEMSe 142
4.8 Summary and Outlook 142
References 143
5 Error Sources 147
Abstract 147
5.1 An Overview of Influence Factors in X-ray Computed Tomography Metrology 147
5.1.1 CT System 148
5.1.1.1 X-ray Source 148
5.1.1.2 CT Detector 150
5.1.1.3 Positioning System 152
5.1.2 Workpiece 155
5.1.3 Environment 157
5.1.4 Data Processing 158
5.1.5 Operator 162
5.1.5.1 Workpiece Fixturing and Orientation 162
5.1.5.2 Magnification 163
5.1.5.3 X-ray Source Settings 164
5.1.5.4 Number of Projections and Image Averaging 165
5.1.5.5 Measurement Strategy 166
5.2 CT Artefacts in the Reconstructed Volume 167
5.2.1 Feldkamp Artefacts 167
5.2.2 Beam Hardening Artefacts 169
5.2.3 Scatter Artefacts 171
5.2.4 Metal Artefacts 173
5.2.5 Detector Artefacts 174
5.2.6 Noise Artefacts 175
5.3 CT Artefact Correction 176
5.3.1 Beam Hardening Correction 177
5.3.1.1 Hardware Correction 177
5.3.1.2 Linearization Techniques 177
5.3.1.3 Iterative Artefact Reduction 178
5.3.2 Scatter Correction 180
5.3.2.1 Scatter Reduction Techniques 180
5.3.2.2 Scatter Correction Techniques 181
5.3.3 Signal-to-Noise-Ratio Improvement 181
5.3.4 Ring Artefact Correction 184
References 185
6 Qualification and Testing of CT Systems 189
Abstract 189
6.1 System Qualification and System Parameter Set-Up 190
6.1.1 Z-Direction Linear Stage Alignment 192
6.1.2 Y-Direction Linear Stage Alignment and Z-Direction Linear Stage Position Qualification 192
6.1.3 Detector Alignment 195
6.1.4 Rotary Stage Alignment 196
6.1.5 Focal Spot Qualification 196
6.1.6 Flat Panel Detector Intensity Qualification 197
6.2 Procedures for Performance Verification: Acceptance and Reverification Testing 198
6.2.1 Methodology 198
6.2.2 Local Error Testing—Probing Error Tests 200
6.2.3 Global Error Testing—Length Measurement Error Tests 202
6.3 Reference Objects 203
6.3.1 Length Standards 204
6.3.2 Reference Spheres 206
6.3.3 Step Cylinders 207
6.3.4 Application-Related Reference Objects 208
6.4 Structural Resolution 209
6.4.1 Influence Quantities on Structural Resolution and Demands on Definitions 210
6.4.2 Metrological Structural Resolution (MSR) 213
6.4.3 Interface Structural Resolution (ISR) 217
6.5 The Current State of Standardization 218
6.5.1 National Standardization in Germany 219
6.5.2 The Current State of National Standardization in Japan 222
6.5.3 The Current State of National Standardization in the US 222
6.5.4 The Current State of Standardization at ISO Level 222
6.5.5 Special Topic: Current Standardization Activities for Structural Resolution 223
6.6 Interlaboratory Comparisons 224
6.6.1 “CT Audit” Intercomparison (2009–2012) 224
6.6.2 Intercomparison on Structural Resolution in ISO TC 213 WG 10 (2011) 225
6.6.3 CIA-CT Intercomparison on CT for Industrial Applications in the Slaughterhouses (2011–2012) 226
6.6.4 CIA-CT Intercomparison on Industrial CT for Measurement Applications (2012–2013) 227
6.6.5 InteraqCT Comparison on Assemblies (2015/2016) 228
References 230
7 Towards Traceability of CT Dimensional Measurements 233
Abstract 233
7.1 Introduction 233
7.2 Measurement Traceability 234
7.2.1 History 234
7.2.2 The Standard Unit of Length 235
7.2.3 Achieving Traceability of Dimensional Measurements 236
7.3 Calibration of Coordinate Measuring Systems 238
7.4 CT Instrument Calibration 245
7.4.1 CT Geometrical Calibration 246
7.4.2 Calibration of the Imaging System 254
7.4.3 Calibration of the Tomographic Reconstruction Step 259
7.5 Assessing Task-Specific CT Measurement Uncertainty 260
7.5.1 The GUM Method 260
7.5.2 Monte Carlo by Simulation 262
7.5.3 Comparator Method 264
7.6 Discussion 268
Acknowledgements 268
References 268
8 Applications of CT for Non-destructive Testing and Materials Characterization 271
Abstract 271
8.1 CT for Internal Quality Inspection of Biological Materials 273
8.1.1 CT Systems for Biological Materials 273
8.1.2 Understanding Structure of Biological Materials 277
8.1.3 Other Developments in CT Imaging of Biological Materials 280
8.2 CT in Hydrocarbon Reservoir Characterization 281
8.2.1 Data Acquisition and Treatment 281
8.2.2 Hydrocarbon Reservoir (Analogue) Characterization 284
8.2.2.1 Porosity and Mineralogy Characterization 285
8.2.2.2 Pore Surface Shape 288
8.2.2.3 Representative Elementary Volume 290
8.2.2.4 Multiple Point Geostatistics 290
8.2.2.5 µCT and Rock Petrophysics 292
8.2.2.6 CT in Fluid Flow Characterization 295
8.2.3 Conclusion 297
8.3 CT to Characterize the Behaviour of Materials 297
8.3.1 Visualization and Characterization 297
8.3.2 Mechanical Behaviour 298
8.3.3 Moisture Transport 301
8.3.4 Conclusion 302
8.4 CT Research on Composites, Foams and Fibrous Materials 302
8.4.1 CT of Cellular Materials (Foams) 303
8.4.2 CT of Random Fibre Composites 304
8.4.3 CT of Textiles and Textile Composites 305
8.5 CT to Optimize the Next Generation Biomaterials 309
8.5.1 Materials Characterization 310
8.5.1.1 Morphological Analysis 310
8.5.1.2 Surface Properties 310
8.5.2 In Vitro Evaluation 313
8.5.3 In Vivo Evaluation 314
8.5.4 Conclusion 315
8.6 CT to Optimize Dental Restorations and to Evaluate Dental Implants 315
8.6.1 Finite-Element Analysis 315
8.6.2 Quantification of Voids, Gaps and Microleakage 316
8.6.3 Image Correlation and Image Registration 317
8.6.4 Conclusion 318
8.7 CT for Research on Dental Hard Tissues 318
8.7.1 Visualization of the Morphology and Analysis of Tooth Structure 318
8.7.2 Visualization and Analysis of Tooth Resorption 320
8.7.3 Visualization and Analysis of Tooth Caries 321
8.7.4 Visualization and Analysis of Microcracks 322
8.7.5 Visualization of Tooth Development Anomalies: Enamel Invagination and Evagination 322
8.8 Conclusion 324
Acknowledgements 324
References 324
9 Applications of CT for Dimensional Metrology 336
Abstract 336
9.1 CT Measurements in the Industrial Practice 337
9.2 Application Examples of CT in the Manufacturing Field 341
9.2.1 Cast and Formed Products 341
9.2.2 Machined Products 344
9.2.3 Laser Cut Products 349
9.2.4 Additive Manufactured Products 349
9.2.5 Injection Moulded Products 353
9.2.6 Assembled Products 357
9.3 CT Measurements for Medicine: A Case Study 364
9.3.1 CT Based Planning of Procedures at the Lateral Skull Base 365
9.3.2 Estimating the Uncertainty of Medical CT Measurements 366
9.4 Challenges of CT Dimensional Measurements 369
References 370
| Erscheint lt. Verlag | 18.10.2017 |
|---|---|
| Zusatzinfo | VII, 369 p. 273 illus. |
| Verlagsort | Cham |
| Sprache | englisch |
| Themenwelt | Naturwissenschaften ► Physik / Astronomie |
| Technik ► Maschinenbau | |
| Wirtschaft ► Betriebswirtschaft / Management ► Logistik / Produktion | |
| Schlagworte | CT Dimensional Measurement • CT Scanning Industry • CT System Calibration • Data Processing Workflow • Image Artifacts • Measurement Uncertainty Determination • Nondestructive Materials Testing • Reference Objects • Surface Determination |
| ISBN-10 | 3-319-59573-3 / 3319595733 |
| ISBN-13 | 978-3-319-59573-3 / 9783319595733 |
| Haben Sie eine Frage zum Produkt? |
Größe: 15,6 MB
DRM: Digitales Wasserzeichen
Dieses eBook enthält ein digitales Wasserzeichen und ist damit für Sie personalisiert. Bei einer missbräuchlichen Weitergabe des eBooks an Dritte ist eine Rückverfolgung an die Quelle möglich.
Dateiformat: PDF (Portable Document Format)
Mit einem festen Seitenlayout eignet sich die PDF besonders für Fachbücher mit Spalten, Tabellen und Abbildungen. Eine PDF kann auf fast allen Geräten angezeigt werden, ist aber für kleine Displays (Smartphone, eReader) nur eingeschränkt geeignet.
Systemvoraussetzungen:
PC/Mac: Mit einem PC oder Mac können Sie dieses eBook lesen. Sie benötigen dafür einen PDF-Viewer - z.B. den Adobe Reader oder Adobe Digital Editions.
eReader: Dieses eBook kann mit (fast) allen eBook-Readern gelesen werden. Mit dem amazon-Kindle ist es aber nicht kompatibel.
Smartphone/Tablet: Egal ob Apple oder Android, dieses eBook können Sie lesen. Sie benötigen dafür einen PDF-Viewer - z.B. die kostenlose Adobe Digital Editions-App.
Zusätzliches Feature: Online Lesen
Dieses eBook können Sie zusätzlich zum Download auch online im Webbrowser lesen.
Buying eBooks from abroad
For tax law reasons we can sell eBooks just within Germany and Switzerland. Regrettably we cannot fulfill eBook-orders from other countries.
aus dem Bereich


