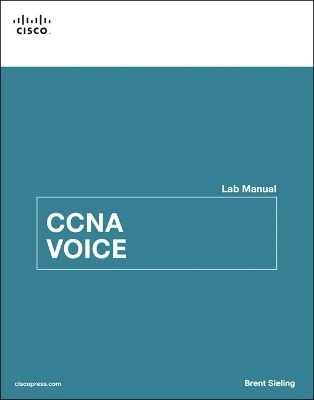
CCNA Voice Lab Manual
Cisco Press (Verlag)
978-1-58713-299-5 (ISBN)
CCNA Voice Lab Manual gives you extensive hands-on practice for developing an in-depth understanding of voice networking principles, tools, skills, configurations, integration challenges, and troubleshooting techniques. Using this manual, you can practice a wide spectrum of tasks involving Cisco Unified Communications Manager, Unity Connection, Unified Communications Manager Express, and Unified Presence.
CCNA Voice Lab Manual addresses all exam topics and offers additional guidance for successfully implementing IP voice solutions in small-to-medium-sized businesses.
CCNA Voice 640-461 Official Exam Certification Guide, Second Edition
ISBN-13: 978-1-58720-417-3
ISBN-10: 1-58720-417-7
CCNA Voice Portable Command Guide
ISBN-13: 978-1-58720-442-5
ISBN-10: 1-58720-442-8
Configuring Cisco Unified Communications Manager and Unity Connection: A Step-by-Step Guide, Second Edition
ISBN-13: 978-1-58714-226-0
ISBN-10: 1-58714-226-0
CCNA Voice Quick Reference
ISBN-13: 978-1-58705-767-0
ISBN-10: 1-58705-767-0
Brent Sieling is an instructor and program director for the two-year Network Specialist Associate Degree at Madison College. He has been teaching networking classes full-time since January 2006 and part-time for three semesters prior to that. He is the lead contact for the Academy Support Center and Instructor Training Center at Madison College’s Cisco Networking Academy, providing support to over 30 high schools and technical colleges in the state of Wisconsin. Brent previously worked as a network specialist at the Madison Metropolitan School District, where he managed a network of over 50 schools. Brent currently holds the Cisco Certified Network Associate (CCNA), CCNA Voice, and CCNA Security certifications, and he was previously a Certified Novell Engineer (CNE). He recently completed the Cisco Academy Instructor Trainer Qualification (ITQ) process to become an Academy Instructor Trainer. Brent has been a regular presenter at the Cisco Academy conferences.
Introduction xxviii
Hardware Section xxix
Part I: Voice Concepts
Chapter 1 Traditional and Unified Voice 1
Lab 1-1: Telephony Terminology 1
Task 1: Matching Items 1
Chapter 2 Understanding Cisco Unified Communications Solutions 3
Lab 2-1: Key Features of Cisco Unified Communications Solutions 3
Task 1: Questions 3
Chapter 3 Establishing Network Connectivity and Understanding IP Phone Registration 5
Lab 3-1: Network Connectivity 5
Task 1: Clear and Cable Devices 6
Step 1-1: Clear Prior Configurations 6
Step 1-2: Cable Router and Switch 6
Task 2: Configure Basic Setup 6
Step 2-1: Configure Basic Setup on the Router 6
Step 2-2: Configure Basic Setup on the Switch 6
Task 3: Configure the Switch 7
Step 3-1: Create the VLANs 7
Step 3-2: Configure the Trunk Port 7
Step 3-3: Configure the Access Ports 8
Step 3-4: Configure the Switch Management Interface 9
Task 4: Configure the Router Subinterfaces 9
Step 4-1: Configure the Data VLAN Subinterface 9
Step 4-2: Configure the Management VLAN Subinterface 9
Step 4-3: Configure the Voice VLAN Subinterface 9
Step 4-4: Activate the Router Interface 9
Task 5: Verification 10
Step 5-1: Verify Switch VLAN Configuration 10
Step 5-2: Verify Switch Port Assignment 10
Step 5-3: Verify Router Subinterface IP Assignment 11
Task 6: DHCP Services 11
Step 6-1: Configure DHCP Pools on the Router 12
Task 7: Test and Cleanup 12
Step 7-1: Test Connectivity 12
Step 7-2: Save the Configurations 12
Step 7-3: (Optional) Explore Power Over Ethernet on the Switch 13
Lab 3-2: Network Time Protocol 15
Task 1: NTP Services 15
Step 1-1: Load Prior Configurations 15
Step 1-2: (Optional) Configure Local Time Zone 16
Step 1-3: Manually Set the Clock 16
Step 1-4 (Option A): Contact an NTP Server on the Internet 16
Step 1-4 (Option B): Configure Another Cisco Router to Act as an NTP Server 17
Step 1-5: Verify That the Time Is Synchronized 17
Step 1-6: (Optional) Configure the Switch to Get NTP from the Router 21
Step 1-7: Save the Configurations 21
Lab 3-3: Phone Boot/Registration Process 22
Task 1: Questions 22
Part II: Cisco Unified Communications Manager Express (CUCME)
Chapter 4 Introduction to CUCME Administration 23
Lab 4-1: Exploring the Command-Line Interface and Cisco Configuration Professional 23
Task 1: Load Prior Configurations 23
Task 2: Explore Telephony Services 24
Step 2-1: Determine CUCME Version 24
Task 3: Exploring CUCME Using CCP 25
Step 3-1: Test Connectivity Between PC and Router 25
Step 3-2: Configure the Router for CCP Access 25
Step 3-3: Open the CCP Application 26
Step 3-4: Create a Community in CCP 26
Step 3-5: Working with a Community in CCP 27
Step 3-6: Viewing Device Configuration Options in CCP 28
Step 3-7: Establish Unified Communication Functionality in CCP 29
Step 3-8: Deliver Configuration from CCP to the Router 29
Step 3-9: Review Unified Communications Features Summary 30
Step 3-10: Save the Startup Configuration in CCP 31
Step 3-11: Save the Running Configuration to the PC Using CCP 31
Step 3-12: Explore Other Parts of CCP 32
Lab 4-2: Integrated HTML GUI 33
Task 1: Load Prior Configurations 33
Task 2: Configure the Router for Web Access 33
Step 2-1: Enable HTTP Service on the Router 33
Step 2-2: Create a CUCME Web Administrator Account 34
Step 2-3: Use a Web Browser to Connect to the GUI 34
Chapter 5 Configuring Phones and Users in Cisco Unified Communications Manager Express (CUCME) 37
Lab 5-1: Basic Manual Phone Configuration Using the CLI 37
Task 1: Load Prior Configurations 38
Task 2: Configure Telephony-Service 38
Step 2-1: Disable Auto Phone Registration 38
Step 2-2: Establish the Maximum Number of Phones Allowed to Register 38
Step 2-3: Establish the Maximum Number of Directory Numbers (Phone Numbers) 38
Step 2-4: Set the IP Address Used by CUCME 39
Step 2-5: Create the Default Template Files 39
Step 2-6: Inspect the IP Phone Generic Config File 40
Task 3: Configuring Directory Numbers 41
Step 3-1: Create a Dual-Line Ephone-dn 41
Step 3-2: Repeat to Create the Next Three Phone Numbers 41
Task 4: Manually Configure an Ephone and Associate the First Directory Number 42
Step 4-1: Get the MAC Address of the First Phone 42
Step 4-2: Create an Ephone and Assign the MAC Address 42
Step 4-3: Assign the First Directory Number to the First Button on the Phone 43
Step 4-4: Connect the First Phone to the Switch 44
Task 5: Manually Configure a Second Phone 44
Step 5-1: Connect the Second Phone to the Switch 45
Step 5-2: Assign the Second and First Directory Numbers to the Second Phone 45
Step 5-3: Make a Call 46
Step 5-4: Assign Other Extensions to the First Phone 46
Step 5-5: Clear Configuration for the Next Lab 47
Lab 5-2: Advanced Manual Phone Configuration Using the CLI 48
Task 1: Load Prior Configurations 48
Task 2: Configure Telephony-Service 49
Step 2-1: Configure Required Telephony-Service Settings 49
Step 2-2: Configure System Time in Telephony-Service 49
Step 2-3: Configure a Banner Message for Phones with a Display 49
Task 3: Configure Ephone-dns 50
Step 3-1: Add the name Option to an Ephone-dn 50
Step 3-2: Change the Phone Display Header Bar 50
Step 3-3: Change the Text for Each Line Button 51
Step 3-4: Create the Other Ephone-dns 51
Task 4: Configure Ephones 51
Step 4-1: Create an Ephone, and Assign the MAC Address and a Directory Number 51
Step 4-2: Assign the Ephone Model Type 52
Step 4-3: Assign Users to the Phones 52
Step 4-4: Create the Other Ephones 52
Task 5: Test and Save Configuration 53
Step 5-1: Make Calls 53
Step 5-2: Save the Configuration 53
Lab 5-3: Adding Directory Numbers, Phones, and Users with Cisco Configuration Professional (CCP) 54
Task 1: Load Prior Configurations 54
Task 2: Configure Telephony Settings 55
Step 2-1: View Telephony Settings 55
Step 2-2: Edit General Telephony Settings 55
Step 2-3: Edit System Config Telephony Settings 56
Task 3: Configure Extensions 57
Step 3-1: View Extension Settings 57
Step 3-2: Create an Extension 58
Step 3-3: Create More Extensions 60
Task 4: Configure Phones and Users 60
Step 4-1: View Phone/User Settings 60
Step 4-2: Create a Phone 60
Step 4-3: Create a User 62
Step 4-4: Create Another Phone/User 62
Task 5: Test and Save Configuration 63
Step 5-1: Make Calls 63
Step 5-2: Examine the Router Configuration 64
Step 5-3: Save the Configuration 64
Lab 5-4: Examine VoIP Protocols 65
Task 1: Load Prior Configurations 65
Task 2: Establish Packet Capture 65
Step 2-1: Configure the Switch for Packet Capture 66
Task 3: Start Wireshark Capture 66
Step 3-1: Examine Phone Boot in Wireshark 66
Step 3-2: Examine a Phone Call in Wireshark 67
Task 4: Play Captured Audio 70
Task 5: Clean Up 72
Chapter 6 Cisco Unified Communications Manager Express (CUCME) Dial Plans and QoS 73
Lab 6-1: (Optional) Configuring Analog Interfaces 73
Task 1: Load Prior Configurations 74
Task 2: Examine the Interfaces in the Router 74
Task 3: Configuring FXS Ports 75
Step 3-1: Call Signaling Selection 75
Step 3-2: Connect an Analog Phone and Make a Call 75
Step 3-3: Call Progress Tones 75
Step 3-4: Description Information 76
Step 3-5: Caller ID Information 76
Step 3-6: Examine Interface Status 77
Step 3-7: Automatically Dialing Phones 77
Task 4: Configuring FXO Ports 77
Step 4-1: Configure Dial Type 77
Step 4-2: Configure Ring Number 78
Step 4-3: Description Information 78
Step 4-4: Connect the FXO Port (Optional) 78
Step 4-5: Redirect Incoming Calls (Optional) 78
Lab 6-2: (Optional) Configuring Digital Interfaces 79
Task 1: Load Prior Configurations 79
Task 2: Examine Resources in the Router 80
Step 2-1: Examine Hardware 80
Step 2-2: Examine Controller Interface 80
Step 2-3: Examine DSP Resources 81
Task 3: Configure CCS (PRI) Settings 82
Step 3-1: Configure ISDN Switch Type 82
Step 3-2: Configure Clock Participation 82
Step 3-3: Configure Controller T1 Settings 82
Step 3-4: Configure PRI Timeslots 83
Step 3-5: Examine the Interfaces 84
Task 4: Configure ISDN Network End 85
Lab 6-3: Call Legs, Dial Peers, and Wildcards 86
Task 1: Call Legs 86
Step 1-1: Understanding Call Legs 86
Task 2: Introduction to Dial Peers 87
Step 2-1: Call Flow with a Single-Router Dial Peer Exercise 87
Step 2-2: Create POTS Dial Peers 88
Step 2-3: Call Flow for Dual-Router Dial Peers Without Wildcards Exercise 89
Task 3: Introduction to Wildcards in Cisco Unified Communications Manager Express (CUCME) 90
Step 3-1: Call Flow for Dual-Router Dial Peers with Wildcards Exercise 91
Step 3-2: Create Destination Patterns Using Wildcards 92
Task 4: Create POTS and VoIP Dial Peers 93
Lab 6-4: Call Processing, Dial Plans, and Digit Manipulation 95
Task 1: Outbound Call Processing 95
Step 1-1: Examining Dial-Peer Selection 95
Step 1-2: Understanding Dial-Peer Selection 97
Step 1-3: Troubleshooting Dial-Peer Selection with the show dial-peer voice summary Command 99
Step 1-4: Troubleshooting Dial-Peer Selection with Debug 101
Task 2: POTS Dial-Peer Behavior and Digit Manipulation 102
Step 2-1: Examining POTS Dial-Peer Digit Stripping 103
Task 3: Inbound Dial-Peer Selection 106
Step 3-1: Examine Digit Matching for Inbound Calls 106
Task 4: Dial Plans for the PSTN 107
Step 4-1: Understanding Dial Plans 107
Step 4-2: Creating a PSTN Dial Plan for the NANP 108
Lab 6-5: Dial-Peer Configuration Using the CLI 110
Task 1: Load Prior Configurations 111
Task 2: Configure Hardware Used by the Dial Peers 112
Task 3: Configure Secondary Dial Tone 112
Task 4: Configure the PSTN Dial Peers 113
Step 4-1: Configure Emergency Services Calls 113
Step 4-2: Configure Service Code Calls 114
Step 4-3: Configure Local Calls 114
Step 4-4: Configure Long-Distance (Toll) Calls 114
Step 4-5: Configure Toll-Free Calls 115
Step 4-6: Configure Premium-Rate Calls 115
Step 4-7: Configure International Calls 115
Step 4-8: Make Test Calls to the PSTN Simulator 116
Task 5: Inbound Calls 117
Step 5-1: Configure for Inbound Calls 117
Step 5-2: Test Inbound Calls 118
Task 6: Calls over the WAN 119
Step 6-1: Configure a WAN Connection 119
Step 6-2: Configure a Routing Protocol (Optional) 119
Step 6-3: Configure Four-Digit VoIP Dial Peers to Other Pods Using the WAN 119
Step 6-4: Create VoIP Dial Peer for Any Other Pods 120
Step 6-5: Verify Calls to Other Pods Using the WAN 120
Task 7: PSTN Failover 120
Step 7-1: Configure a PSTN Failover 120
Step 7-2: Configure a PSTN Failover 121
Step 7-3: Configure Remaining PSTN Failover Dial Peers 121
Step 7-4: Test PSTN Failover 121
Step 7-5: Verify That VoIP Dial Peers Resume Calls When the WAN Is Back Up 121
Lab 6-6: Dial-Peer Configuration Using CCP 122
Task 1: Load Prior Configurations 123
Task 2A: Configure Digital T1/E1/PRI Interface 124
Step 2A-1: Digital Trunks 124
Step 2A-2: T1/E1 Interface 124
Step 2A-3: Deliver Configuration from CCP to the Router 125
Step 2A-4: Deliver Configuration from CCP to the Router 126
Task 2B: Configure Analog FXO/FXS Interfaces 126
Step 2B-1: Analog Trunks 126
Task 3: Configure Secondary Dial Tone 127
Task 4: Create Outgoing Dial Plan 128
Step 4-1: POTS Dial Plans 128
Step 4-2: Import Outgoing Template 128
Step 4-3: Outgoing Dial Plan Summary 129
Step 4-4: Selecting Destination Trunk 130
Step 4-5: Apply Configuration 130
Task 5: Create Outbound POTS Dial Peers 131
Step 5-1: View POTS Dial Peers 131
Step 5-2: Create POTS Dial Peer 132
Step 5-3: Digit Manipulation 132
Step 5-4: Dial Peers Challenge 133
Step 5-5: Make Test Calls to the PSTN Simulator 134
Task 6: Create Incoming Dial Plan 134
Step 6-1: Create Dial Plans Wizard Selection 134
Step 6-2: Incoming Dial Plan Summary 134
Step 6-3: Create Incoming Dial Plan 134
Step 6-4: Test Incoming Dial Plan 135
| Erscheint lt. Verlag | 21.2.2013 |
|---|---|
| Verlagsort | Indianapolis |
| Sprache | englisch |
| Maße | 217 x 275 mm |
| Gewicht | 1344 g |
| Themenwelt | Mathematik / Informatik ► Informatik ► Netzwerke |
| Informatik ► Weitere Themen ► Zertifizierung | |
| ISBN-10 | 1-58713-299-0 / 1587132990 |
| ISBN-13 | 978-1-58713-299-5 / 9781587132995 |
| Zustand | Neuware |
| Informationen gemäß Produktsicherheitsverordnung (GPSR) | |
| Haben Sie eine Frage zum Produkt? |
aus dem Bereich


