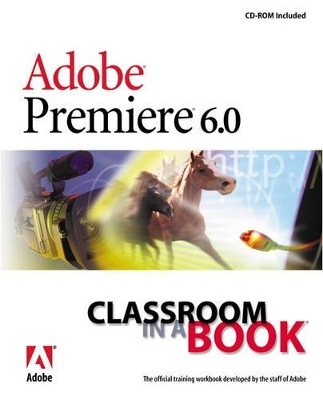
Adobe Premiere 6.0
Adobe Press,U.S.
978-0-201-71018-2 (ISBN)
- Titel ist leider vergriffen;
keine Neuauflage - Artikel merken
Create dazzling digital films and videos with Adobe Premiere! Adobe Premiere, one of the most widely used digital video editing tools today, is used to create everything from personal projects, professional Hollywood movie trailers, and animated GIFs and animations for the Web. Updated for the newest version of Premiere, Adobe Premiere 6.0 Classroom in a Book is an ideal resource for editing digital video or film. Lessons contain step-by-step instructions for creating a specific project. Topics covered include: basic editing principles, digital video editing, transitions, audio, creating a title, superimposing, motion, subclips, and virtual clips.
The Adobe Creative Team is made up of members of Adobe's User Education Group. They take their expertise in training users to work with Adobe products, combine it with the creative talents of the Adobe Premiere team, and add the valuable content of the CD-ROM to make a unique learning package from Adobe Systems.
(NOTE: Each chapter concludes with Review Questions and Review Answers.)
Getting Started.
About Classroom in a Book. Prerequisites. Installing the Adobe Premier Program. Starting Adobe Premiere. Installing the Classroom in a Book Fonts. Copying the Classroom in a Book Files. Restoring Default Preferences. Additional Resources. Adobe Certification.
A Tour of Adobe Premiere.
Starting the Tour. Starting the Tour as a New Project. Creating a Rough Cut. Trimming Clips. Adding Audio. Adding a Transition. Changing the Speed of a Clip. Adding Special Effects to a Video Clip. Implementing an Image. Animating a Clip Using Keyframes.
Lesson 1. Getting to Know to Know the Work Area.
Starting the Adobe Premiere Program. Setting up Your Workspace. Working with the Project Window Working with the Monitor Window. Navigating to a Specific Time. Using Palettes. Learning Keyboard Shortcuts.
Lesson 2. About Digital Video Editing.
How Adobe Premiere Fits into Video Production. Measuring Video Time. Measuring Frame Size and Resolution. Understanding Video Data Compression. Capturing Video. Understanding Transparency and Superimposing. Using Audio in a Video. Creating Final Video.
Lesson 3. Basic Editing.
Getting Started. Viewing the Finished Movie. Importing Clips. Adding Clips to the Timeline. Developing a Storyboard and Using Automate-to-Timeline. Previewing Your Rough Cut. Selecting Clips in a Bin and Using Automate-to-Timeline. Trimming Clips after they are in the Timeline. Pre-trimming Clips Using the Source View. Fine-tuning the Timeline. Exporting the Movie. Exploring your Own.
Lesson 4. Adding Transitions.
Restoring Default Preferences. Getting Started. Viewing the Finished Movie and a Reference Project File. Importing the Clips for the Project. About Transitions. The Transitions Palette. Inserting a Transition. Previewing the Transition. Pre-trimming a Clip and Adding a Transition. Adding a Transition Using the Transition Palette. Changing Transitions. Adding Multiple Transactions. Exporting and Organizing Clips. Creating an L-cut. Getting to know the Audio Workspace. Adjusting Audio Levels in the Timeline. Automating the Mixing process. Exporting the Movie. Exporting on Your Own.
Lesson 5. Adding Audio.
Restoring Default Preferences. Getting Started. Viewing the Finished Movie. Importing and Organizing Clips. Creating an L-cut. Using Markers to Synchronize Clips. Overlaying Video without Sound. Adding Audio Clips. Getting to know the Audio Workspace. Adjusting Audio Levels in the Timeline. Automating the mixing process. Exporting the Movie. Exploring on Your Own.
Lesson 6. Additional Editing Techniques.
Getting Started. Viewing the Finished Movie. Viewing the Assembled Project. Understanding Three-point and Four-point Editing. Using the Toggle Shift Tracks Options. Linking and Unlinking Clips. Closing a Gap with the Ripple Delete Command. Exporting the Movie. Exploring on Your Own.
Lesson 7. Advanced Editing Techniques.
Getting Started. Viewing the Finished Movie. Viewing the Assembled Project. Understanding the Extract and Lift Functions. Removing Frames with the Extract Button. Removing Frames with the Lift Button. Pasting into a Gap. Fine-tuning Your Edits. Understanding the Trim View. Changing a Clip's Rate. Exporting the Movie. Exploring on Your Own.
Lesson 8. Creating a Title.
Restoring Default Preferences. Getting Started. Opening the Existing Project File. Viewing the Finished Movie. About Titles. The Titles Window. Creating a Simple Title. Creating a Graphic Image in the Title Window. Using the Oval Tool. Rolling Titles and Crawling Titles. Previewing Rolling and Crawling Titles. Using Titles in a Premiere Project. Adding Titles to the Timeline. Exporting the Movie, Exploring on Your Own.
Lesson 9. Superimposing.
Getting Started. Viewing the Finished Movie. Superimposing. Creating a Split Screen. Applying the Blue Screen Transparency Key. Applying the Chroma Key. Adding Clips without Transparency. Applying the Track Matte Transparency Key Type. Fading Clips. Exporting the Movie. Exploring on Your Own.
Lesson 10. Adding Motion.
Restoring Default Preferences. Getting Started. Open the Existing Project File. Viewing the Finished Movie. Creating Animation in Premiere. Creating a Traveling Matte. Exporting the Movie. Exploring on Your Own.
Lesson 11. Applying Video and Audio Effects.
Restoring Default Preferences. Getting Started. Opening the Existing Project File. Viewing the Finished Movie. Why Use Effects? Getting to know the Effects Workspace. Applying Effects. Applying Effect in the Correct Order. Copying Effects, Keyframes, and Settings. Changing Effects over Time. Using the Image Pan and ZigZag Effects. Adding a Logo. Applying a Effect to Specific Areas of an Image. Applying Audio Effects. Exporting the Movie. Exploring on Your Own.
Lesson 12: Duplicate Clips and Virtual Clips.
Restoring Default Preferences. Getting Started. Opening the Existing Project File. Viewing the Finished Movie. Understanding Duplicate Clips. Creating Duplicate Clips. Understanding Virtual Clips. Creating Virtual Clips. Nesting Virtual Clips. Assembling the Final Video Program. Editing Virtual Clips. Compiling Virtual Clips. Exporting the Movie. Exploring on Your Own.
| Erscheint lt. Verlag | 26.9.2001 |
|---|---|
| Verlagsort | Indianapolis |
| Sprache | englisch |
| Maße | 189 x 231 mm |
| Gewicht | 922 g |
| Themenwelt | Kunst / Musik / Theater ► Fotokunst |
| Informatik ► Grafik / Design ► Film- / Video-Bearbeitung | |
| ISBN-10 | 0-201-71018-8 / 0201710188 |
| ISBN-13 | 978-0-201-71018-2 / 9780201710182 |
| Zustand | Neuware |
| Haben Sie eine Frage zum Produkt? |