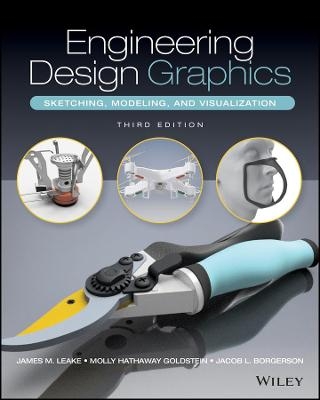
Engineering Design Graphics
John Wiley & Sons Inc (Verlag)
978-1-119-49043-2 (ISBN)
In the newly revised Third Edition of Engineering Design Graphics: Sketching, Modeling, and Visualization, renowned engineering graphics expert James Leake delivers an intuitive and accessible guide to bringing engineering concepts and projects to visual life. Including updated coverage of everything from freehand sketching to solid modeling in CAD, the author comprehensively discusses the tools and skills you'll need to sketch, draw, model, document, design, manufacture, or simulate a project.
1 ENGINEERING DESIGN 1
INTRODUCTION 1
ASPECTS OF ENGINEERING DESIGN 1
ANALYSIS AND DESIGN 4
PRODUCT ANATOMY 5
DESIGN PHASES 5
DESIGN PROCESS OVERVIEW 6
NEEDS ASSESSMENT 7
PROBLEM DEFINITION 7
BACKGROUND RESEARCH 7
DESIGN CRITERIA 8
DESIGN CONSTRAINTS 8
ALTERNATIVE SOLUTIONS 9
ANALYSIS 12
EVALUATION AND SELECTION 12
SPECIFICATION 16
COMMUNICATION 20
Written Reports 20
Recommended report-writing steps 20
Oral Presentations 21
BEGINNING VERSUS INFORMED DESIGNER PATTERNS (SIDEBAR) 23
CONCURRENT ENGINEERING 23
Design for Manufacture and Assembly 25
TEAMWORK 26
QUESTIONS 27
2 HUMAN-CENTERED DESIGN AND DESIGN THINKING 29
INTRODUCTION 29
ENGINEERING DESIGN, ART, AND SCIENCE
Introduction
Design: a fundamental human activity
Engineering Design from 1400 to 1900
Engineering Education after 1900
TWO DESIGN PARADIGMS
Design as rational problem solving
Design as a reflective practice
WICKED PROBLEMS
DIVERGENT AND CONVERGENT QUESTIONING
DOUBLE DIAMOND DESIGN PROCESS
HUMAN-CENTERED DESIGN
DESIGN THINKING
Introduction
Three spaces of innovation
Inspiration
Observation
Empathy
Ideation
Empathy
Ideation
Brainstorming
Prototyping
Implementation
Test and iterate
T-shaped individuals (sidebar)
Radical collaboration
QUESTIONS
3 PRODUCT DISSECTION
INTRODUCTION
PRODUCT SUITABILITY
PRODUCT DISSECTION PROCEDURE
PRE-DISSECTION ANALYSIS
DISSECTION
Craftsman locking pliers disassembly steps
PRODUCT DOCUMENTATION
PRODUCT ANALYSIS
PRODUCT IMPROVEMENT
REASSEMBLY
COMMUNICATION
QUESTIONS
4 FREEHAND SKETCHING
INTRODUCTION
SKETCHING TOOLS AND MATERIALS
SKETCHING TECHNIQUES
Line Techniques
Sketching Straight Lines
Sketching Circles
Sketching Ellipses
PROPORTIONING
Estimating Dimensions of Actual Objects
Partitioning Lines
INSTRUMENT USAGE—TRIANGLES
Parallel Lines
Perpendicular Lines
LINE STYLES
QUESTIONS
5 PLANAR PROJECTIONS AND PICTORIAL VIEWS
PLANAR PROJECTIONS
Introduction
Classification of Planar Projections: Projector Characteristics
Preliminary Definitions
Block coefficient
Classification of Planar Projections: Orientation of Object with Respect to Projection Plane
Further Distinctions Between Parallel and Perspective Projections
Classes of Parallel Projections
OBLIQUE PROJECTIONS
Oblique Projection Geometry
Oblique Projection Angle
Classes of Oblique Projections
Oblique projection angle in 2D
Receding Axis Angle
ORTHOGRAPHIC PROJECTIONS
Orthographic Projection Geometry
Orthographic Projection Categories
AXONOMETRIC PROJECTIONS
ISOMETRIC PROJECTIONS
Isometric Drawings
Multiview Projections
INTRODUCTION TO PICTORIAL SKETCHING
OBLIQUE SKETCHES
Introduction
Axis Orientation
Receding Axis Scale
Object Orientation Guidelines
Sketching procedure for a simple extruded shape (see Figure 5-37)
Step-by-step cabinet oblique sketch example for a cut block (see Figure 5-38)
Step-by-step cavalier oblique sketch example for an object with circular features (see Figure 5-39)
ISOMETRIC SKETCHES
Introduction
Axis Orientation
Isometric Scaling
Isometric Grid Paper
Object Orientation Guidelines
Step-by-step isometric sketch example for a cut block (see Figure 5-46)
Circular Features in an Isometric View
Step-by-step isometric sketch example for a cylinder (see Figure 5-47)
Step-by-step isometric sketch example for a box with holes on three faces (see Figure 5-48)
Step-by-step sketch example for an object with circular features (see Figure 5-49)
Chapter review: pictorial sketching scalability
QUESTIONS
6 PERSPECTIVE PROJECTIONS AND PERSPECTIVE SKETCHES
PERSPECTIVE PROJECTION
Historical Development
Perspective Projection Characteristics
Classes of Perspective Projection
Vanishing Points
One-Point Perspective Projection
Two-Point Perspective Projection
Three-Point Perspective Projection
Perspective Projection Variables
Perspective projection using a 3D CAD system
Projection plane location
Lateral movement of CP
Vertical movement of CP
Varying distance from CP
PERSPECTIVE SKETCHES
Introduction
Terminology
One-Point Perspective Sketches
Two-Point Perspective Sketches
Proportioning Techniques
Step-by-step one-point perspective sketch example (see Figure 6-26)
Step-by-step two-point perspective sketch example (see Figure 6-27)
Summary: orientation of pictorial sketching axes (see Figure 6-28)
QUESTIONS
7 MULTIVIEWS
MULTIVIEW SKETCHING
Introduction—Justification and Some Characteristics
Glass Box Theory
Alignment of Views
Transfer of Depth
View Selection
Third-Angle and First-Angle Projection
Line Conventions
Multiview drawing of a cylinder (see Figure 7-21)
Line Precedence
Generic three multiview sketch procedure (see Figure 7-24)
Step-by-step multiview sketch example (see Figure 7-25)
Intersections and Tangency 92 Fillets and Rounds
Machined Holes
Conventional Representations: Rotated Features
Step-by-step multiview sketch example: object with complex features (see Figure 7-33)
VISUALIZATION TECHNIQUES FOR MULTIVIEW DRAWINGS
Introduction and Motivation
Treatment of Common Surfaces
Normal surfaces
Inclined surfaces
Oblique surfaces
Projection Studies
Adjacent Areas
Surface Labeling
Similar Shapes
Vertex Labeling
Analysis by Feature
Missing-Line and Missing-View Problems
QUESTIONS
8 SECTION AND AUXILIARY VIEWS
SECTION VIEWS
Introduction
Section View Process
Section Lining (Hatch Patterns)
Full Sections
Half Sections
Offset Sections
Broken-Out Sections
Revolved Sections
Removed Sections
Conventional Representations: Section Views
Conventional Representations: Thin Features
Section View Construction Process—Example 1
Section View Construction Process—Example 2
Conventional Representations: Aligned Sections
Assembly Section Views
AUXILIARY VIEWS
Introduction
Definitions
Auxiliary View Projection Theory
Auxiliary Views: Three Cases
General Sketching Procedure for Finding a Primary Auxiliary View
Step 1
Step 2
Step 3
Step 4 (optional)
Step 5
Step 6
Finding a Primary Auxiliary View of a Contoured Surface
Finding a Partial Auxiliary View, an Isometric Pictorial, and a Missing View, Given Two Views
QUESTIONS
9 DIMENSIONING AND TOLERANCING
DIMENSIONING
Introduction
Units of Measurement
Application of Dimensions
Terminology
Reading direction for dimensional values
Arrangement, placement, and spacing of dimensions
Using Dimensions to Specify Size and Locate Features
Symbols, Abbreviations, and General Notes
Dimensioning Rules and Guidelines
Prisms
Cylinders and arcs
Finish Marks
TOLERANCING
Introduction
Definitions
Tolerance Declaration
Tolerance Accumulation
Mated Parts
Basic Hole System: English Units
Basic Shaft System: English Units
Step-by-step tolerance calculation of a clearance fit using the basic hole system (see Figure 9-27)
Step-by-step tolerance calculation of an interference fit using the basic hole system (see Figure 9-28)
Preferred English Limits and Fits
Running or sliding clearance fit (RC)
Locational clearance fit (LC)
Transition clearance or interference fit (LT)
Step-by-step tolerance calculation of a clearance fit using the basic shaft system (see Figure 9-30)
Locational interference fit (LN)
Force or shrink fit (FN)
Step-by-step tolerance calculation using English-unit fit tables, basic hole system (see Figure 9-31)
Step-by-step tolerance calculation using English-unit fit tables, basic shaft (see Figure 9-32)
Preferred Metric Limits and Fits
Step-by-step tolerance calculation using metric-unit fit tables, hole basis (see Figure 9-39)
Step-by-step tolerance calculation using metric-unit fit tables, shaft basis (see Figure 9-40)
Tolerancing in CAD
QUESTIONS
10 CAD: SOLID MODELING
INTRODUCTION
Computer-Aided Design
Categories of CAD Systems
Computer-aided drawing
Solid modeling
Topology (Sidebar)
Parametric modeling
Direct modeling
Surface Modeling – NURBS and Freeform
Building Information Modeling (BIM) (Sidebar)
CAD Viewing and Display
PARAMETRIC MODELING
Introduction
Terminology
Part Modeling
Introduction
Sketch mode
Feature creation
Part editing
Part creation process (see Figure 10-32)
Assembly Modeling
Introduction
Joints
CAD libraries
Advanced Modeling Strategies
Cloud-Based CAD
QUESTIONS 241
11 CAD: NURBS AND FREEFORM SURFACE MODELING
NURBS SURFACE MODELING
Introduction
Parametric Curves and Cubic Splines
Parametric representation of a curve (sidebar)
Bézier Curves
B-Splines
NURBS
Surfaces
Curvature
Continuity
Class A Surfaces
FREEFORM SURFACE MODELING
Introduction
Polygon meshes and polygonal modeling
Subdivision surfaces
NURBS Limitations
T-Splines
The Bézier Award (Sidebar)
QUESTIONS
12 PRODUCT DOCUMENTATION
WORKING DRAWINGS
Model-based definition
DETAIL DRAWINGS
ASSEMBLY DRAWING VIEWS
BILL OF MATERIALS AND BALLOONS
SHEET SIZES
TITLE BLOCKS
BORDERS AND ZONES
REVISION BLOCKS
DRAWING SCALE
TOLERANCE NOTES
STANDARD PARTS
WORKING DRAWING CREATION USING PARAMETRIC MODELING SOFTWARE
Extracting a detail drawing from a parametric part model (see Figure 12-16)
Using existing part models to create an assembly model (see Figure 12-17)
Extracting a sectioned assembly drawing (see Figure 12-18)
Creating an exploded view (see Figure 12-19)
Creating an exploded view drawing with parts list and balloons (see Figure 12-20)
INDUSTRY SPOTLIGHT: FISKARS GROUP
QUESTIONS
13 ADDITIVE MANUFACTURING
INTRODUCTION
AM TECHNOLOGIES
Vat photopolymerization
Material extrusion
Powder bed fusion
Material jetting
CLASSIFICATION OF AM TECHNOLOGIES
3D PRINTER FILE FORMATS
STL REPAIR TOOLS
CHARACTERISTICS OF AM SYSTEMS
Part orientation
Support structure
Hatch style
LOW-COST AM
Industrial category AM
Professional category 3D printers
Consumer (home and hobby, desktop) category 3D printers
DESIGN FOR ADDITIVE MANUFACTURING
Design for conventional manufacturing processes
Design for AM
QUESTIONS
9 3D SCANNING
REVERSE ENGINEERING
3D SCANNING
Introduction
3D Scanner Pipeline
Mesh terminology
3D Scanning Technologies
Contact-based scanners
Noncontact scanners
Laser triangulation
Structured Light
Reality Capture
Photogrammetry
Time of Flight
Reverse Engineering Software
Mesh reconstruction (or point processing)
NURBS surface modeling from scan data
Parametric CAD model from scan data
QUESTIONS
15 SIMULATION
UPFRONT ANALYSIS
FINITE ELEMENT ANALYSIS
Modeling and Meshing
Boundary Conditions
Contour plot
Results
FEA workflow
GENERATIVE DESIGN
Generative design workflow
DYNAMICS SIMULATION SOFTWARE
Dynamics Simulation Software Demonstration
QUESTIONS
A ANSI PREFERRED ENGLISH LIMITS AND FITS
B ANSI PREFERRED METRIC LIMITS AND FITS
INDEX 3
DRAWING SHEETS
| Erscheinungsdatum | 18.09.2018 |
|---|---|
| Co-Autor | Jacob L. Borgerson |
| Verlagsort | New York |
| Sprache | englisch |
| Maße | 203 x 249 mm |
| Gewicht | 794 g |
| Themenwelt | Informatik ► Weitere Themen ► CAD-Programme |
| Technik ► Maschinenbau | |
| ISBN-10 | 1-119-49043-X / 111949043X |
| ISBN-13 | 978-1-119-49043-2 / 9781119490432 |
| Zustand | Neuware |
| Informationen gemäß Produktsicherheitsverordnung (GPSR) | |
| Haben Sie eine Frage zum Produkt? |
aus dem Bereich


