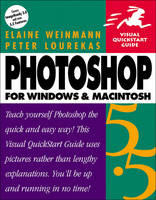
Photoshop 5.5 for Windows and Macintosh
Peachpit Press Publications (Verlag)
978-0-201-69957-9 (ISBN)
- Titel erscheint in neuer Auflage
- Artikel merken
Adobe Photoshop is the application of choice for digital image manipulation, but its complexity can be daunting for beginners. Photoshop 5.5 for Windows and Macintosh: Visual QuickStart Guide is an accessible, how-to guide to basic photo editing, manipulation, and correction techniques that will have you up and running in no time. In addition to the basics, you'll find full coverage of the latest features in this newly Web-enhanced version of Photoshop, which includes ImageReady 2.0.
With this guide, you don't have to wander through menus or wade through text. Concise, step-by-step instructions walk you through each task, and the numerous pictures and captions reassure you that you're in the correct dialog box, pop-up menu, or entry field. The book is full of updated material on using Photoshop effectively for Web images, and also covers the higher-end changes in Photoshop 5.5: improved color management, editable PostScript type layers, the new History palette and brush, 16-bit channel support, and other new palettes, actions, and tools.
1. The Basics.
How to Use the ToolBox. The ToolBox. The Photoshop Screen: Macintosh. The Photoshop Screen: Windows. The Menus. The Palettes. How to Use the Palettes. Color Palette. Swatches Palette. Channels Palette. Brushes Palette. Options Palette. Layers Palette. Paths Palette. Navigator Palette. Info Palette. History Palette. Actions Palette.
2. Photoshop Color.
Pixels. RGB vs. CMYK Color. Channels. Image Modes. The Blending Modes. Color management. Why do We Need It? Don't Hesitate: Calibrate. Calibrate Your Monitor. Fining a Space. Enter RGB Setup Info. The Present RGB Color Spaces. CMYK Setup. Grayscale Setup. ProFile Setup. Enter ProFile Setup Info. Leaving a Legacy. Create a ProFile for Legacy Files.
3. Startup.
Launch Photoshop (Windows). Launch Photoshop (Macintosh). Where Images come From. Scanning. Desktop Scanning Software Basics. 16-bits Per Channel Mode. Scan into Photoshop. Calculate the Proper Resolution for a Scan or for an Existing Image. File Storage Sizes of Scanned Images. Potential Gray Levels at Various Output Resolutions and Screen Frequencies. Using the Status Bar. Storage Size. Create a New Image. Open an Image within Photoshop. Open a Photoshop Image from Windows Explorer. Open a Photoshop Image from the Finder. Thumbnails. Open a Kodak Photo CD File. Open an EPS, PDF, or Illustrator File as a New Image. Pixel Paste. Place an EPS, PDF, or Adobe Illustrator Image into an Existing Photoshop Image. Change an Image's Dimensions for Print Output. Change an Image's Pixel Dimensions for On-screen Output. Change an Image's Resolution. Resize an Image to Fit a Specific Width or Height. Resize an Image Automatically. Apply the Unsharp Mask Filter. Change the Canvas Size. Crop an Image. Specify Dimensions and Resolutions as You Crop an Image. Enlarge an Image's Canvas Area Using the Crop Tool. Flip an Image. Rotate an Image a Preset Amount. Rotate an Image by Specifying a Number. Save a New Image. The Photoshop Format. Save an Existing Image. Revert to the Last Saved Version. Save a New Version of an Image. Copy a File and Continue to Work on the Original. Close an Image. Exit/Quit Photoshop.
4. Navigate.
Change the View Size Using the Navigator Palette. Change the View Size Using the Zoom Tool. Move a Magnified Image in its Window. Change the Screen Display Mode. Display One Image in Two Windows. Recolor the Work Canvas.
5. Select.
Select an Entire Layer. Create a Rectangular or Elliptical Selection. Create a Freeform Selection. Create a Polygonal Selection. Select by Color (Magic Wand). Select by Color (Color Range). Select Using the Magnetic Lasso. The Magnetic Lasso Palette Options. Create a Frame Selection. Select a Narrow Border around a Selection. Deselect a Selection. Reselect the Last Selection. Delete a Selection. Move a Selection Marquee. Switch the Selected and Unselected Areas. Hide a Selection Marquee. Transform a Selection Marquee. Add to a Selection. Subtract from a Selection. Modify a Selection via a Menu Command. Vignette an Image.
6. Compositing.
Move a Selection's contents. Drag-copy a Selection. Align a Layer or Layers to a Selection Marquee. Clipboard Facts. Before Copying between Images. Copy and paste a Selection. Drag-and-drop a Selection between Images. Paste into a Selection. Paste into a Smaller Image. Sharpen or Blur Edges. Hide or Show Rulers. Change the Rulers' Zero Origin. Hide or Show the Grid. Create a Guide. Remove Guides. Use the Measure Tool. Clone Areas in the Same Image. Use the Pattern Stamp Tool. Clone from Image to Image. Feather a Selection. Defringe a Layer. Smooth a Selection Edge.
7. Layers.
Chapter Overview. Create a New Layer. Turn a Selection into a Layer. Duplicate a Layer in the Same Image. Hide or Show Layers. Flip a Layer. Transform (Scale, Rotate, Skew, Distort, or Apply Perspective to) a Layer by Dragging. Free Transform. Transform a Layer by Entering Numeric Values. Convert the Background into a Layer. Create a Background for an Image. Tools and Layers. Preserve Transparency. Use all Layers. Image Mode Changes. Restack a Layer. Move a Layer. Using the Move Tool. Save a Copy of a Layer in a separate File. Delete a Layer. Drag-and-drop a Layer to another Image (Layers Palette). Drag-and-drop a Layer to another Image (Move Tool). Copy and Paste Only the Visible Part of a Layer to another Image. Merge or Flatten. Merge Two Layers. Merge Multiple Layers. Flatten Layers. Other Merge Commands.
8. History.
Linear versus Non-Linear Mode. Other History Options. Clearing the Palette. Revert to a Prior History State. Duplicate a State. Delete a State. Create a snapshot of a History State. Make a Snapshot become the Latest State. Delete a Snapshot. Create a New Document from a History State or Snapshot. Use the History Brush. Fill a Selection or a Layer with a History State. Erase to History.
9. Lights & Darks.
Adjustment Layers. Adjustment Basics. Adjustment Layer Basics. Create an Adjustment Layer. Edit an Adjustment Layer. Merge an Adjustment Layer. Ways to Use Adjustment Layers. Equalize a Layer. Invert Lights and Darks. Make a Layer High Contrast. Posterize. Adjust Brightness and Contrast (Brightness/Contrast). Adjust Brightness and Contrast Using Levels. Screen Back a Layer (or the Background). Lighten Using the Dodge Tool or Darken Using the Burn Tool. Restrict the Area a New Adjustment Layer Affects. Restrict the Area in Existing Adjustment Layer Affects. Make a Layer ( or the Background) Grayscale Using Channel Mixer.
10. Choose Colors.
What are the Foreground and Background Colors? Choose a Color Using the Color Picker. Choose a Custom Color. Choose a Color from an Image Using the Eyedropper. Choose a Color Using the Color Palette. Choose a Color from the Swatches Palette. Add a Color to the Swatches Palette. Delete a Color from the Swatches Palette. Save an Edited Swatches Set. Replace a Swatches Set. Load a Swatches Set.
11. Recolor.
Adjust Command Basics. Fill a Selection or a Layer with a Color, a Pattern, or Imagery. More about Pattern-making. Apply a Stroke to a Selection or a Layer. Preview Fill Modes and Opacities on a Selection or a Layer. Adjust a Color Image Using Hue/Saturation. Place Color Samplers on an Image. Move a Color Sampler. Using the Info Palette with the Color Sampler Tool. Remove a Color sampler. Replace Colors. Strip Color from a Layer or the Background. Colorize or Color Correct Using Color Balance. Adjust Color Using Thumbnail Variations. Saturate or Desaturate Colors Using the Sponge Tool. Use the Channel Mixer. Curves and Levels. Adjust Color or Values Using the Curves Command. Adjust Individual Color Channels Using Levels. Heighten Color or Silhouette Color Areas on Black. Convert a Color Layer to Grayscale and Selectively Restore its Color. Create a Spot Color Channel. Paint on a Spot Color Channel. Spot Color Channel basics. Printing Spot Color Channels. Convert an Alpha Channel into a Spot Color Channel.
12. Paint.
Use the PaintBrush or AirBrush Tool. Draw straight Lines. Modify a Brush Tip. Create a New Brush Tip. Delete a Brush Tip. Create a Calligraphic Brush Tip. Apply Tints to a Grayscale Image. Create a Brush Tip from an Image. Save a Brush Set. Load a Brush Set. Fill an Area Using the Paint Bucket Tool. Erase Part of a Layer. Auto Erase. Smudge Colors. Apply a Gradient. Create or Edit a Gradient. Remove a Gradient. Change the Opacity of Gradient Colors. Create a Multicolor Wash.
13. More Layers.
Change the Opacity of a Layer. Layer Effects Basics. Create a Drop Shadow or Inner Shadow. Transform a Drop Shadow (method 1). Transform a Drop Shadow (method 2). Create an Outer or Inner Glow. Create a Bevel or Emboss Effect. Other Effects Commands. The Layer Blending Modes. Blend Pixels between Two Layers. Blend a Modified Layer with the Original Layer. What is a Layer Mask? Create a Layer Mask. Reshape a Layer Mask. Move a Mask without Moving its Layer. Duplicate a Layer Mask. Fill Type with Imagery Using a Layer Mask. Temporarily Remove the Effects of a Layer Mask. Apply or Discard the Effects of a Layer Mask. Create a Clipping Group of Layers. Remove a Layer from a Clipping Group. Ungroup an Entire Clipping Group. Link Layers (and move them as a unit). Align Two or more Linked Layers. Distribute three or more Linked Layers. 3D Transform. Apply the 3D Transform Filter.
14. Masks.
Chapter Overview. Save a Selection to a Channel Using the Current Options Settings. Save a Selection to a Channel and Choose Options. Display a Channel Selection. Load a Channel Selection onto an Image Using the Current Options. Load a Channel Selection onto an Image and Choose Options. Save Selection Operations. Load Selection Operations. Rename a Channel. Delete a Channel. Duplicate a Channel. Reshape an Alpha Channel Mask. Reshape a Selection Using Quick Mask Mode. Create a Quick Mask. Choose Quick Mask Display Options.
15. Paths.
Chapter Overview. Convert a Selection into a Path. Create a Path Using the Pen Tool. Create a Selection Using the Magnetic Pen Tool. The Magnetic Pen Palette Options. Create a Path Using the Freeform Pen. Move a Path. Add to an Existing, Open Path. Transform an Entire Path. Transform Points on a Path. Copy a Path in the same Image. Drag-and-drop a Path to another Image. Save a Work Path. Display a Path. Hide a Path. Select Anchor Points on a Path. Reshape a Path. Delete a Path. Deselect a Path. Convert a Closed Path into a Selection. Stroke a Path. Fill a Path. Clip the Background from an Image for Use in another Application. Export a Path to Illustrator or FreeHand.
16. Type
Chapter Overview. Create an Editable Type Layer. Rotate Type. Transform Type. Edit a Type Layer. Move a Type Layer. Render Type into Pixels. Render without Rendering. Screen back an Image behind Type. Screen back Type. Fill Type with Imagery from another Document Using Paste Into. Fill Type with Imagery Using a Clipping Group of Layers. Create Fading Type. Apply Layer Effects to Semi-transparent Type. Create a Type Selection. Move a Type Selection. Stroke a Type Selection. Deselect a Type Selection. Create Type in a Spot Channel. Edit Type in a Spot Channel. Create a Type Mask for an Adjustment Layer.
17. Filters.
Filter basics. How Filters are Applied. Using a Filter Dialog Box. Lessening a Filter's Overall Effects. Restricting the Area a Filter Affects. Making the Filter Effects Look Less Artificial. Maximizing a Filter's Effect. Texture Mapping Using a Filter. All the Filters Illustrated. Artistic Filters. Brush Strokes Filters. Distort Filters. Pixelate Filters. Render Filters. Sharpen Filters. Sketch Filters. Stylized Filters. Texture Filters. A Few Filter Exercises. Create a Wrinkled Edge. Take the Easy Way Out. Apply a Texture Using a Layer Mask. Turn a Photograph into a Painting or a Drawing. Our Watercolor Filter. Apply the Mosaic Filter Using Graduated Values. Motion Blue Part of an Image. Cast a Light on an Image.
18. Actions.
Chapter Overview. Create a New Actions Set. Record an Action. Insert a Stop in an Action. Exclude or Include a Command from Playback. Play Back an Action on an Image. Replay an Action on a Batch of Images. Add a Command (or Commands) to an Action. Delete a Command from an Action. Activate or Deactivate a Dialog Box Pause for a Command in an Action. Change the Order of Commands. Rerecord an Entire Action Using Different Dialog Box Settings. Rerecord a Single Command in an Action. Duplicate an Action. Delete an Entire Action. Save an Actions Set to a File. Load an Additional Actions Set onto the Actions Palette. Replace the Current Actions Set with a Different Actions Set. Run One Action in another Action. Other Automate Commands. Perform a Conditional Image Mode Change. Fit Image to Width and/or Height Dimensions. Make a Contact Sheet Index of the contents of a folder. Convert a multi-page PDF to Photoshop format.
19. Preferences.
Memory & Image Cache Preferences. General Preferences. Saving Files Preferences. Display & Cursors Preferences. Transparency & Gamut Preferences. Units & Rulers Preferences. Guides & Grid Preferences. Plug-ins & Scratch Disk Preferences.
20. Print.
Chapter Overview. Print to a Black-and-white Laser Printer (Windows). Print to a Black-and-white Laser Printer (Macintosh). Print to a PostScript Color Printer. Prepare a File for an IRIS or Dye Sublimation Printer or an Imagesetter. The Page Setup Dialog Box. The Page Setup Options Illustrated. Apply Trapping. Preparing a File for another Application. Photoshop to QuarkXPress. Photoshop to PageMaker. Photoshop to a Film Recorder Photoshop to Illustrator. Photoshop to CorelDRAW. Save an Image as an EPS. Save an Image as a DCS 2.0. Save an Image as a TIFF. Save an RGB Image as a BMP or PICT. Produce a Duotone. Print a Grayscale Image Using a Pantone Tint. Color Reproduction Basics Enter CMYK Setup Settings. Save a Separation Table. Match the On-screen Image to a Color Proof. Correct Out-of-gamut Colors. Color Correction: First Glance.
21. Web/ImageReady.
Indexed Color. Convert an Image to Indexed Color Mode. Edit an Indexed Color Image's Color Table. Create a Custom Palette for Indexed Images. Index a 24-bit RGB Image to a Custom 8-bit Palette. Photoshop to Director. Using the Layers Palette as a Storyboard. RGB vs. Indexed Color Images. How to Copy a Pixel Object with an Anti-aliased Edge into Director. Photoshop to After Effects. Photoshop to the Web. Image Size. GIF. Color Depth. JPEG. Dithering. Alias versus Anti-alias. PNG-8 Format. Use the ImageReady Previews. Back and Forth between ImageReady and Photoshop. Quick-optimize. Create and Apply a Droplet. Optimizing an Image in the JPEG or PNG-24 Format. Make Flat-color Areas Web-safe. Preview Potential Browser Dither in an Optimized Image. Controlling Dithering. Preview Windows and Mac Gama Values. Change the Gamma for an Optimized File. Preview an Optimized Image in a Browser on Your System. Save a File in ImageReady. Save an Optimized File in ImageReady. Update an Existing HTML File. Change a Web Page Title or Embed Copyright Information. Enter Type in ImageReady. Style Type in ImageReady. Anti-aliasing Type in ImageReady. Moving Type from Photoshop 5.5 to ImageReady. Mixed Optimization for Hybrids. Slicing. Slice an Image Using a Command. Slice an Image Manually. Convert an Auto-slice into a User-slice. Delete Slices. Hide/show Slice Borders and Labels. Resize User-slices. Slice an Image into Multiple Links. Create an Image Map. Optimize an Individual Slice. Copy Optimization Settings from One Slice to Another. Link Slices. Unlink Slices. Attach an ALT Tag to a Slice or to an Entire Image. Rollovers. Create a Rollover for a Slice. Create a Rollover using a Layer Effect. Preview a Rollover. Create a Secondary Rollover. Create a Button to be Used on a Web Page. GIFT Animations. Move Layer Imagery Across an Image via Animation. Make Imagery Fade in or out. Remove Frames from an Animation. Choose Options for Animation Playback. What You can Tween. Preview an Animation. Crate a Rocking Animation. Edit an Animation. Make an Existing Animation Reverse Itself to the First Frame. Apply a Second Animation Effect to an Existing Animation. Reduce the Image Size. Crop the Image. Make a Rollover Trigger an Animation Sequence. Optimize an Animation. Save a GIF Animation. Open an Animation in the GIF Format. Layer Effects. Apply Layer Effects in ImageReady. Remove a Layer Effect. The Color Fill and Gradient/Pattern Effects. Other Layer Features in ImageReady. Apply a Style to a Layer. Preserve a Layer Effect as a Style. Background Tiling. Create a Tile for an HTML Background. Preview an Image as a tiled Background. Assign an HTML Tile File as a Background for an Image. Remove an HTML Tile Background or Solid Color from an Image. Use Photoshop's Save for Web Dialog Box.
Appendix A: Glossary.
Appendix B: Copyright Protection.
Appendix C: Directory of Artists.
Appendix D: Photoshop 5.5.
Adjust an Image Using Auto Contrast. Use the Background Eraser. Use the Magic Eraser. Mask a Shape Using the Extract Command. Magic Wand and Paint Bucket Enhancement. Brushes Palette Enhancement. Use the Art History Brush. Color Palette Enhancements. Create a Contact Sheet. Create a Picture Package. Create a Web Gallery. Type Enhancements.
Index.
| Erscheint lt. Verlag | 14.10.1999 |
|---|---|
| Verlagsort | Berkeley |
| Sprache | englisch |
| Maße | 179 x 229 mm |
| Gewicht | 726 g |
| Themenwelt | Informatik ► Grafik / Design ► Photoshop |
| ISBN-10 | 0-201-69957-5 / 0201699575 |
| ISBN-13 | 978-0-201-69957-9 / 9780201699579 |
| Zustand | Neuware |
| Informationen gemäß Produktsicherheitsverordnung (GPSR) | |
| Haben Sie eine Frage zum Produkt? |
aus dem Bereich


