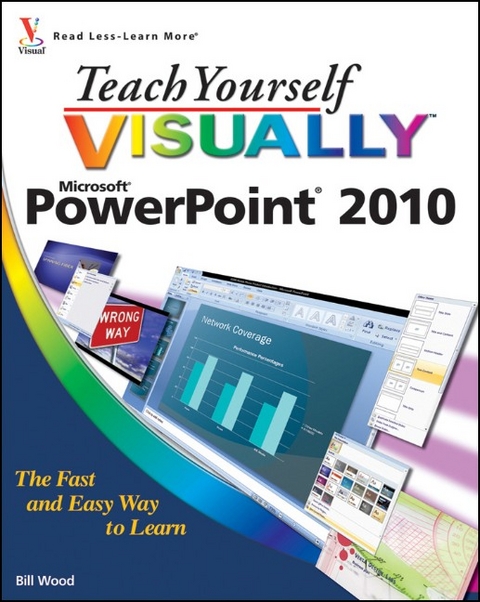
Teach Yourself Visually PowerPoint 2010
John Wiley & Sons Ltd (Verlag)
978-0-470-57766-0 (ISBN)
- Titel ist leider vergriffen;
keine Neuauflage - Artikel merken
Fast, easy way to get the very most out of PowerPoint 2010 Present your work in style in a PowerPoint presentation using the tips and techniques in this visual guide to PowerPoint 2010. It covers the basics, as well as all the exciting new changes and additions in a series of easy-to-follow, full-color, two-page tutorials. Learn how to create slides, dress them up using templates and graphics, add sound and animation, and more. If you're looking for a practical, "show me, don't tell me" guide to PowerPoint 2010, this is the book for you. * Helps you create presentations with greater impact using PowerPoint 2010, the latest generation of Microsoft's presentation software; PowerPoint 2010 is part of the new Microsoft Office 2010 suite of products * Introduces PowerPoint 2010's new features, including the new Reading View, new transitions tab, and a new screenshot function * Shows you how to create slides, dress them up with templates and graphics, add sound and animation, and present in a business or Internet setting * Features easy-to-follow, full-color, two-page tutorials Add more power to your PowerPoint presentations with this practical guide.
William (Bill) Wood is a consultant who teaches and writes programs in the Microsoft Office Suite and VBA programming. As a part time writer, he has written several self-published classroom workbooks about Microsoft Access and Excel. He has a formal education as a Biomedical Engineer, in which he worked for many years, and is currently attending graduate classes at Milwaukee School of Engineering in the field of Medical Informatics. Bill also works as a volunteer member of the National Ski Patrol.
Chapter 1: Getting Started with PowerPoint Basics. Introducing PowerPoint. Start and Exit PowerPoint. Explore the Normal View. Navigate PowerPoint Views. Work with Ribbon Groups, Commands, and Galleries. Hide the Ribbon Commands. Find and Use KeyTips. Using the Quick Access Toolbar. Resize the Notes Pane. Using Help. Chapter 2: Changing PowerPoint Options. Introducing PowerPoint Options. Modify General Options. Change Spelling Options. Change AutoCorrect Settings. Change AutoFormat Settings. Customize Save Options. Modify View and Slide Show Options. Change Editing Settings. Work with Print Options. Customize the Quick Access Toolbar. Customize the Ribbon. Chapter 3: Beginning with Presentation Fundamentals. Start a New Presentation. Save a Presentation. Open an Existing Presentation. Close a Presentation. Delete a Presentation. Arrange Presentation Windows. Find a Presentation. Chapter 4: Writing and Formatting Presentation Text. Understanding Presentation Structure. Explore Text Formatting Options. Add a Slide. Delete a Slide in Normal View. Navigate Slides. Type and Edit Text on a Slide. Format Text Color and Style. Format Text Font and Size. Cut, Copy, and Paste Text. Format Bulleted Lists. Using the Spelling Feature. Using the Research Feature. Chapter 5: Working with Outlines. Hide and Redisplay the Outline Tab. Understanding How Outline and Slide Content Relate. Enter Presentation Content in an Outline. Move Slides in an Outline. Promote and Demote Items. Collapse and Expand an Outline. Edit Outline Content. Insert Slides from an Outline. Chapter 6: Working with Layouts and Placeholders. Understanding Layouts and Placeholders. Insert a New Slide with the Selected Layout. Change a Slide Layout. Using Layouts with a Content Placeholder. Insert a Table. Format a Table. Insert a Chart. Format a Chart. Edit Chart Data. Insert Pictures and Clip Art. Insert Media Clips. Insert a SmartArt Graphic. Edit SmartArt. Insert a Slide from Another File. Chapter 7: Using Themes. Understanding Themes. Control Design Aspects with Themes. Apply a Theme to Selected Slides. Apply a Theme to All Slides. Apply a Theme to a Section. Change Theme Colors for Selected Slides. Change Theme Colors for All Slides. Modify a Font Theme. Modify the Background. Apply a Texture or Picture Background. Save Your Own Theme. Make a Theme the Default for New Presentations. Save a Template. Chapter 8: Using Masters. Understanding Masters. Understanding Slide Master Elements. Open and Close Slide Master View. Remove a Placeholder. Insert a Placeholder. Add a Footer. Add a Date. Set Up Slide Numbers. Insert a Graphic in Slide Master View. Work with Multiple Masters. Insert a New Blank Master. Preserve a Master. Rename a Master. Work with the Notes Master. Work with Handout Master. Omit Master Graphics on a Slide. Create a Custom Slide Layout. Chapter 9: Adding Graphics and Drawings. Insert Clip Art. Draw a Shape. Add a Text Box. Add Text to a Shape. Select Objects. Format Objects. Move Objects. Resize Objects. Flip and Rotate Objects. Apply a New Effect. Add WordArt. Insert a Hyperlink. Group and Ungroup Objects. Change Object Order. Using the Grid and Guidelines. Nudge Objects. Align Objects. Chapter 10: Organizing Slides. Move a Slide. Copy and Paste a Slide. Delete a Slide in Slide Sorter View. Make a Duplicate Slide. Hide a Slide. Zoom In the View. Go to an Individual Slide. Change Slide Orientation. View Slides in Grayscale. Group Slides into Sections. Chapter 11: Adding Action to Slides. Understanding Animations and Action Buttons. Apply an Animation. Preview an Animation. Add an Animation. Change Animation Effects. Change the Animation Trigger. Modify Animation Timing. Reorder Animations. Remove an Animation. Insert an Action Button. Introducing Transitions. Apply a Transition. Remove a Transition. Advance a Slide after a Set Time Interval. Add a Transition Sound. Set a Transition Speed. Chapter 12: Including Media Enhancements. Insert a Picture. Add a Border. Adjust Brightness and Contrast. Adjust Color. Crop a Picture. Remove the Background from a Picture. Using Artistic Effects. Compress Pictures. Using Layout Effects. Insert Video Clips. Insert Audio Clips. Trim Video Clips. Trim Audio Clips. Insert a Screenshot. Chapter 13: Finishing, Setting Up, and Running a Slide Show Send a Presentation for Review. Add a Comment. Review and Delete Comments. Select a Show Type and Show Options. Specify Slides to Include. Rehearse Timing. Record a Narration. Run a Slide Show. Package a Presentation. Chapter 14: Printing Presentations. Using Print Preview. Print Slides. Print Hidden Slides. Print Handouts. Print the Outline Only. Print Notes. Print in Black and White or Grayscale. Frame Slides. Chapter 15: Publishing Presentations. Share Presentations. Compare Presentations. Make a PDF Document from a Presentation. Create a Video of a Presentation. Create Handouts with Microsoft Word. Save a Presentation as a Slide Show. Publish Slides as Graphics. Broadcast a Presentation. Chapter 16: Finalizing and Making a Presentation. Get Ready to Present. Start and End a Show. Navigate Among Slides. Using the Pointer. Switch to a Different Program. Display Slide Show Help. Work with Presenter View. Work with Resolution.
| Reihe/Serie | Teach Yourself VISUALLY (Tech) |
|---|---|
| Zusatzinfo | col. ill |
| Verlagsort | Chichester |
| Sprache | englisch |
| Maße | 186 x 231 mm |
| Gewicht | 750 g |
| Themenwelt | Informatik ► Office Programme ► Powerpoint |
| ISBN-10 | 0-470-57766-5 / 0470577665 |
| ISBN-13 | 978-0-470-57766-0 / 9780470577660 |
| Zustand | Neuware |
| Informationen gemäß Produktsicherheitsverordnung (GPSR) | |
| Haben Sie eine Frage zum Produkt? |
aus dem Bereich


