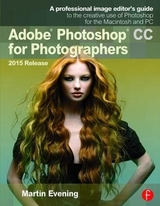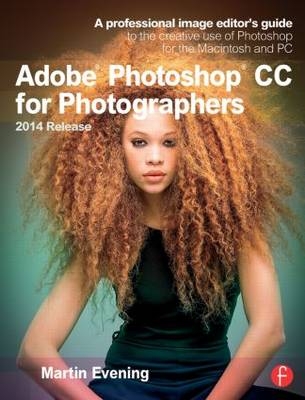
Adobe Photoshop CC for Photographers, 2014 Release
CRC Press (Verlag)
978-1-138-81247-5 (ISBN)
- Titel erscheint in neuer Auflage
- Artikel merken
Accompanying the book is the photoshopforphotographers.com website, with sample images, tutorial videos, and bonus chapters.
Inducted into the Photoshop Hall of Fame in 2008, Martin Evening is an internationally renowned professional photographer. Working principally on studio-based beauty photography, Martin uses Photoshop to retouch or manipulate to some degree nearly every image he produces. This regular everyday experience with the software has enabled him to gain extensive specialist knowledge of Photoshop.
Contents
What’s different in this book
Acknowledgments
Chapter 1: Photoshop Fundamentals
Photoshop installation
The Photoshop interface
Creating a new document
User interface brightness
Tabbed document windows
Managing document windows
Synchronized scroll and zoom
Image document window details
Title bar proxy icons (Mac only)
Info panel status information
Rulers, Guides & Grid
`Snap to’ behavior
Pixel Grid view
The Photoshop panels
Panel arrangements and docking
Panel positions remembered in workspaces
Customizing the menu options
Customizing the keyboard shortcuts
Task-based workspaces
Working with a dual display setup
Photoshop CC Tools panel
Options bar
Tool Presets
Selection tools
Color Range
Adjustable tone ranges
Modifier keys
Painting tools
On-the-fly brush changes
On-screen brush adjustments
Brush panel
Brush panel options
Pressure sensitive control
Brush tool presets
Mixer brush
Bristle tip brush shapes
Load/Replace Swatches from HTML
Hex Field
Tools for filling
Tools for drawing
Image editing tools
Move tool
Layer selection using the move tool
Navigation and information tools
Zoom tool shortcuts
Hand tool
Bird’s-eye view
Flick panning
Windows Multi-touch support
Eyedropper tool
Ruler tool
Rotate view tool
Notes tool
Count tool
Screen view modes
Working with Layers
Automating Photoshop
Preset Manager
History
The History panel
History settings and memory usage
History brush
Use of history versus undo
Snapshots
Non-linear history
When files won’t open
Save often
Background Saving
Normal saves
Using Save As… to save images
File formats
Photoshop native file format
Smart PSD files
Large Document (PSB) format
TIFF (Tagged Image File Format)
Pixel order
Byte order
Save Image Pyramid
TIFF compression options
Flattened TIFFs
JPEG
PNG
Photoshop PDF
Adobe Bridge CC
The Bridge interface
Making Bridge CS work with Photoshop CC
Custom work spaces in Bridge
Opening files from Bridge
Slideshows IV V
Camera Raw
DNG and transparency support
Opening photos from Bridge via Camera Raw
Splash screen
Chapter 2: Camera Raw Image Processing
Camera Raw advantages
The new Camera Raw workflow
Does the order matter?
Raw capture
JPEG capture
Editing JPEGs and TIFFs in Camera Raw
Alternative Raw processors
A basic Camera Raw/Photoshop workflow
Camera Raw support
DNG compatibility
Getting raw images into Photoshop
Image ingestion
Importing images via Photo Downloader
Tethered shoot imports
Tethered shooting via Canon EOS Utility
Importing images via other programs
Import Images from Device (Mac only)
Basic Camera Raw image editing
Working with Bridge and Camera Raw
General controls for single file opening
Full size window view
General controls for multiple file opening
New preview controls
Checkpoints
Preview preferences
Workflow options
Saving soft proofed raw files as smart objects
Summary of the proposed soft proofing workflow
Opening raw files as Smart Objects
Saving photos from Camera Raw
Saving a JPEG as DNG
Resolving naming conflicts
New Save dialog
Altering the background color
The histogram display
Digital camera histograms
Interactive histogram
Image browsing via Camera Raw
Camera Raw preferences
Default Image Settings
Camera Raw cache
DNG file handling
JPEG and TIFF handling
Camera Raw cropping and straightening
How to straighten and crop
Basic panel controls
White balance
Using the white balance tool
White balance tool refinements
Basic panel auto white balance adjustments
Process Versions
The Process 2012 tone adjustment controls
Exposure
Contrast
Highlights and Shadows
Whites and Blacks
Suggested order for the Basic panel adjustments
Preserving the highlight detail
When to clip the highlights
How to clip the shadows
Shadow levels after a conversion
Digital exposure
How Camera Raw interprets the raw data
Basic panel image adjustment procedure
Auto tone corrections
Auto Whites and Blacks sliders
Camera-specific default settings
Clarity
Negative clarity
Vibrance and Saturation
Tone Curve panel
Point Curve editor mode
RGB Curves
Correcting a high contrast image
HSL/Grayscale panel
Recovering out-of-gamut colors
Adjusting the hue and saturation
Lens Corrections panel
Accessing and creating custom lens profiles
Lens Corrections: Color tab
Chromatic aberration
Defringe sliders
The Defringe controls in use
Eyedropper tool mode
Localized adjustments: Defringe slider
Lens Corrections: Manual tab
Upright corrections
Synchronizing Upright settings
Transform controls
Lens Vignetting controls
Effects panel
Post Crop Vignetting control
Post Crop Vignette style options
Highlights slider
Adding Grain effects
Camera Calibration panel
New Camera Raw profiles
Camera look settings profiles
Custom camera profile calibrations
DNG Profile Editor
Camera Raw as a Photoshop filter
Spot removal tool
Creating circle spots
Synchronized spotting with Camera Raw
Spot removal tool feathering
Spot removal tool fine-tuning
Visualize spots
Creating brush spots
Deleting spots
Red eye removal
Red eye: pet eye removal
Localized adjustments
Adjustment brush
Initial Adjustment brush options
Brush settings
Adding a new brush effect
Resetting adjustments
Adjustment brush duplication
Editing brush adjustments
Previewing the brush stroke areas
Auto masking
Darkening the shadows
Hand-coloring in Color mode
Graduated filter tool
Graduated color temperature adjustment
Radial filter adjustments
Fill to document bounds
Modifying graduated and radial filter masks
Correcting edge sharpness with the Radial filter
Global sharpening only
Global sharpening + radial filter adjustment
Camera Raw settings menu
Export settings to XMP
Update DNG previews
Load Settings… Save Settings…
Camera Raw defaults
Presets panel
Saving and applying presets
Copying and synchronizing settings
Synchronizing different process versions
Legacy presets
Synchronize Process 2010 from a Process 2012 master
Synchronize Process 2012 from a Process 2010 master
Working with Snapshots
DNG file format
The DNG solution
DNG compatibility
Saving images as DNG
Lossy DNG
DNG Converter
Chapter 3: Sharpening and noise reduction
When to sharpen
Why one-step sharpening is ineffective
Capture sharpening
Capture sharpening for scanned images
Process versions
Improvements to Camera Raw sharpening
Sample sharpening image
Detail panel
Sharpening defaults
The sharpening effect sliders
Amount slider
Radius slider
The suppression controls
Detail slider
Interpreting the grayscale previews
Radius and Detail grayscale preview
Masking slider
Masking slider example
Some real world sharpening examples
Sharpening portrait images
Sharpening landscape images
Sharpening a fine-detailed image
How to save sharpening settings as presets
Capture sharpening roundup
Selective sharpening in Camera Raw
Negative sharpening
Extending the sharpening limits
How to apply localized sharpening
Negative sharpening to blur an image
Noise removal in Camera Raw
Process Versions and noise reduction
Detail panel Noise Reduction sliders
Color noise
Non-raw image noise reduction
Color Smoothness slider
Adding grain to improve appearance of sharpness
Localized noise reduction in Camera Raw
Localized moiré removal in Camera Raw
No sharpening
Smart Sharpened
Localized sharpening in Photoshop
Smart Sharpen filter
Basic Smart Sharpen mode
Advanced Smart Sharpen mode
Removing Motion Blur
Shake Reduction filter
The Shake Reduction controls
Creating a depth of field brush
Chapter 4: Image Editing Essentials
Pixels versus vectors
Photoshop as a vector program
Image resolution terminology
ppi: pixels per inch
lpi: lines per inch
dpi: dots per inch
Desktop printer resolution
Altering the image size
Image interpolation
Nearest Neighbor (hard edges)
Bilinear
Bicubic (smooth gradients)
Bicubic Smoother (enlargement)
Bicubic Sharper (reduction)
Bicubic Automatic
Preserve Details (enlargement)
Basic pixel editing
Photoshop image adjustments
The image histogram
The Histogram panel
Basic Levels editing and the histogram
Bit depth
8-bit versus 16-bit image editing
16-bit and color space selection
Comparing 8-bit with 16-bit editing
The RGB edit space and color gamut
Direct image adjustments
Adjustment layers approach
Adjustments panel controls
Properties panel controls
Maintaining focus in the Properties panel
Levels adjustments
Analyzing the histogram
Curves adjustment layers
On-image Curves editing
Removing curve points
Using Curves in place of Levels
Output levels adjustments
Luminosity and Color blending modes
Locking down portions of a curve
Creating a dual contrast curve
Correcting shadow and highlight detail
Amount
Tonal Width
Radius
Color Correction
Midtone Contrast
Auto image adjustments
Match Color corrections
Enhanced Brightness and Contrast
Color corrections using Curves
Hue/Saturation
Vibrance
Color Lookup adjustments
Color Lookup Table Export
Photo Filter
Multiple adjustment layers
Adjustment layer masks
Properties panel mask controls
Editing a mask using the masks controls
Live shape properties
Cropping
Entering measurement units
Delete cropped pixels
Crop ratio modes
Landscape and portrait mode crops
Crop tool presets
Crop overlay display
Crop tool options
Front Image cropping
Disable edge snapping
Selection-based cropping
Canvas size
Big data
Perspective crop tool
Content-aware scaling
How to protect skin tones
How to remove objects from a scene
Image rotation
Chapter 5: Black and white
Converting color to black and white
Dumb black and white conversions
Smarter black and white conversions
Black & White adjustment presets
Split color toning using Color Balance
Split color toning using Curves adjustments
Split color toning using a Gradient Map
Camera Raw black and white conversions
Pros and cons of the Camera Raw approach
HSL grayscale conversions
Camera Calibration panel tweaks
Camera Raw Split Toning panel
Saturation shortcut
Camera Raw color image split toning
Black and white output
Advanced B&W Photo tips
Chapter 6: Extending the dynamic range
High dynamic range imaging
HDR essentials
Alternative approaches
Bracketed exposures
Photomatix Pro
Displaying deep-bit color
Capturing a complete scenic tonal range
HDR shooting tips
HDR File formats
How to fool Merge to HDR
Basic tonal compression techniques
Blending multiple exposures
Camera Raw adjustments using Process 2012
Processing HDR files in Camera Raw
The Camera Raw options
Merge to HDR Pro
Response curve
Tone mapping HDR images
Local Adaptation
Removing ghosts
How to avoid the `HDR’ look
Smooth Edges option
HDR toning examples
How to smooth HDR toned images
Chapter 7: Image retouching
Basic cloning methods
Clone stamp tool
Clone stamp brush settings
Healing brush
Choosing an appropriate alignment mode
Clone Source panel and clone overlays
Clone and healing sample options
Better healing edges
Spot healing brush
Healing blend modes
Spot healing in Content-Aware mode
Patch tool
The patch tool and content-aware filling
Adaptation Structure control
Content-aware move tool
Content-aware move tool in Extend mode
Enhanced content-aware color adaptation
Working with the Clone Source panel
Perspective retouching
Alternative history brush spotting technique
Portrait retouching
Beauty retouching
Liquify
Advanced Liquify tool controls
Reconstructions
Mask options
View options
Saving the mesh
Photoshop CC Liquify performance
Smart Object support for Liquify
On-screen cursor adjustments
Targeted distortions using Liquify
Chapter 8: Layers, Selections and Masking
Selections and channels
Selections
Quick Mask mode
Creating an image selection
Modifying selections
Alpha channels
Modifying an image selection
Selections, alpha channels and masks
Anti-aliasing
Feathering
Layers
Layer basics
Image layers
Vector layers
Text layers
Adjustment layers
Layers panel controls
Layer styles
Adding layer masks
Viewing in Mask or Rubylith mode
Removing a layer mask
Adding an empty layer mask
Thumbnail preview clipping
Properties Panel in Masks mode
Refine Edge command
View modes
Edge detection
Smart Radius
Adjust Edge section
Refine Edge output
Working with the quick selection tool
Combining a quick selection with Refine Edge
Focus area
Ragged borders with the Refine Edge adjustment
Color Range masking
Layer blending modes
Creating panoramas with Photomerge
Depth of field blending
Working with multiple layers
Color coding layers
Layer group management
Nested group layer compatibility
Managing layers in a group
Clipping masks
Ways to create a clipping mask
Masking layers within a group
Clipping layers and adjustment layers
Layer Comps panel
Layer linking
Selecting all layers
Layer selection using the move tool
Layer selection
Layer mask linking
Layer locking
Lock Transparent Pixels
Lock Image Pixels
Lock Layer Position
Lock All
Generator: generate assets from layers
Extended tagging
Summary of how Generator works
Generator uses
Smarter naming when merging layers
Layer filtering
Isolation mode layer filtering
Transform commands
Repeat Transforms
Interpolation options
Numeric Transforms
Transforming paths and selections
Transforms and alignment
Warp transforms
Perspective Warp
Puppet Warp
Pin rotation
Pin depth
Multiple pin selection
Smart Objects
Drag and drop a document to a layer
Smart Objects
Linked Smart Objects
Creating linked Smart Objects
Packaging linked embedded assets
Resolving bad links
Layers panel Smart Object searches
Photoshop paths
Pen path modes
Drawing paths with the pen tool
Pen path drawing example
Pen tool shortcuts summary
Rubber Band mode
Multi selection path options
Selecting path anchor points
Vector masks
Isolating an object from the background
Chapter 9: Blur, optical and lighting effects filters
Filter essentials
Blur filters
Average Blur
Gaussian Blur
Adding a Radial Blur or Spin blur to a photo
Surface Blur
Box Blur
Shape Blur
Lens Blur
Depth of field effects
Blur Gallery filters
Iris Blur
Radius field controls
Blur Tools options
Tilt-Shift blur
Blur ring adjustments
Field Blur
Spin blur
Path blur
Motion Blur Effects panel
Smart Object support
Blur Gallery filters on video layers
Smart objects and selections
Applying a Blur Gallery filter to a video clip
Blur Gallery filter with a smart object plus mask
Smart Filters
Applying Smart Filters to pixel layers
Lens Corrections
Custom lens corrections
Selecting the most appropriate profiles
Adobe Lens Profile Creator
Interpolating between lens profiles
Lens Correction profiles and Auto-Align
Adaptive Wide Angle filter
How the Adaptive Wide Angle filter works
Applying constraints
Rotating a constraint
Saving constraints
Constraint line colors
Polygon constraints
Calibrating with the Adaptive Wide Angle filter
Editing panorama images
Lighting Effects filter
Properties panel adjustments
Filter Gallery
Chapter 10: Print output
Print sharpening
Judge the print, not the display
High Pass filter edge sharpening technique
Soft proof before printing
Managing print expectations
Making a print
Photoshop Print dialog
Printer selection
Color Management
Rendering intent selection
Hard Proofing
Adobe Photoshop CC for Photographers
Position and Size
Print selected area
Ensuring your prints are centered (Mac)
Printing Marks
Functions
Saving operating system print presets
Print output scripting
Configuring the Print Settings (Mac and PC)
Photoshop managed color on Windows
Custom print profiles
Chapter 11: Automating Photoshop
Working with Actions
Playing an action
Recording actions
Troubleshooting actions
Limitations when recording actions
Actions only record changed settings
Background layers and bit depth
Layer naming
Inserting menu items
Batch processing actions
Exporting and importing presets
Creating a droplet
Conditional Actions
Conditional action droplets
Image Processor
Scripting
Script Events Manager
Automated plug-ins
Crop and Straighten Photos
Fit Image
Index
| Erscheint lt. Verlag | 29.10.2014 |
|---|---|
| Verlagsort | London |
| Sprache | englisch |
| Maße | 189 x 246 mm |
| Gewicht | 1814 g |
| Themenwelt | Kunst / Musik / Theater |
| Informatik ► Grafik / Design ► Digitale Bildverarbeitung | |
| ISBN-10 | 1-138-81247-1 / 1138812471 |
| ISBN-13 | 978-1-138-81247-5 / 9781138812475 |
| Zustand | Neuware |
| Informationen gemäß Produktsicherheitsverordnung (GPSR) | |
| Haben Sie eine Frage zum Produkt? |
aus dem Bereich
